I could spend an awful lot of time writing g stuff about gas system, but at the moment don't have notion to be writing epic installation guides.
If you want to have a chat about it on the phone I'm happy to share the knowledge.
PM me a number and sensible times to call if you're interested.
Paint your Wagon
-
DasLandRoverMan
- The 1-Ton Welder
- Posts: 1334
- Joined: Sat Oct 20, 2012 9:33 am
- Location: West Lakes
- Contact:
-
Wheeledbeast
- In overdrive
- Posts: 1360
- Joined: Mon Apr 15, 2013 1:41 pm
Re: Paint your Wagon
Progress is a little slower than I was hoping for  , but I have managed to mount the Gas tank under the near side load bed just behind the battery box. (This was the position of the original MOD/Series I style fuel tank). I also made a plate to go between the tank and the battery box, to help keep the batteries clean. (I found an old baffle plate of a gas fire to do this with. It is very thin, not magnetic and seems to be coated with some sort of anticorrosion stuff so should be okay) you can just see it behind the tank in the photos.

Photo looking from the rear, followed on the right by a photo looking from the front. I may have gone a bit overboard here with the steel frame , but it is al designed to be easily unbolted and removed from under the vehicle, with minimum disruption to anything else.

This is the top view, but all this will be hidden when I get the new floor in the back.
Also while I had got the paintbrush out I decided to fit a pair of JATE rings to the front dumb irons. It is always good to know you can be towed out of a mess, and these look pretty unobtrusive and are low down so should give a good straight pull. Just remind me to put the shackles on before I get stuck up to the axels in the mire .
.

Next job is to find a good and accessible position to mount the gas regulator.
, but I have managed to mount the Gas tank under the near side load bed just behind the battery box. (This was the position of the original MOD/Series I style fuel tank). I also made a plate to go between the tank and the battery box, to help keep the batteries clean. (I found an old baffle plate of a gas fire to do this with. It is very thin, not magnetic and seems to be coated with some sort of anticorrosion stuff so should be okay) you can just see it behind the tank in the photos.Photo looking from the rear, followed on the right by a photo looking from the front. I may have gone a bit overboard here with the steel frame
, but it is al designed to be easily unbolted and removed from under the vehicle, with minimum disruption to anything else.This is the top view, but all this will be hidden when I get the new floor in the back.
Also while I had got the paintbrush out I decided to fit a pair of JATE rings to the front dumb irons. It is always good to know you can be towed out of a mess, and these look pretty unobtrusive and are low down so should give a good straight pull. Just remind me to put the shackles on before I get stuck up to the axels in the mire
.Next job is to find a good and accessible position to mount the gas regulator.
Last edited by Wheeledbeast on Fri Aug 04, 2017 6:53 am, edited 2 times in total.
-
DasLandRoverMan
- The 1-Ton Welder
- Posts: 1334
- Joined: Sat Oct 20, 2012 9:33 am
- Location: West Lakes
- Contact:
Re: Paint your Wagon
Will try and get round to giving you a shout sometime this week.
Haven't forgotten.
Haven't forgotten.
-
Wheeledbeast
- In overdrive
- Posts: 1360
- Joined: Mon Apr 15, 2013 1:41 pm
Re: Paint your Wagon
Not a vast amount of progress, but it is half a step forwards. A mate of mine found this at the side of the road  . It is just the job for keeping the new fuel filler clean. After a quick scrub up and a bit of paint I think it looks the part.

I was wondering if this was going to be a controversial as the green LR badge, let me know what you think …. Oh and the other down side is I only have one of them
  .
.
. It is just the job for keeping the new fuel filler clean. After a quick scrub up and a bit of paint I think it looks the part.I was wondering if this was going to be a controversial as the green LR badge, let me know what you think
…. Oh and the other down side is I only have one of them .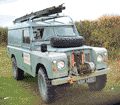
Re: Paint your Wagon
The old mudflaps with the yellow text are a bit of a classic in my mind.
If they were good enough for this...

If they were good enough for this...
http://sebvehicles.blogspot.co.uk/
http://eblrs.org/
1966 IIA Swb 24125067C ex-SEB managers vehicle HMO968D
1969 IIA 1-Ton 22900013A ex-SEB NBK148G
1972 III 1-Ton 26600078A ex-SEB Cherrypicker VJT440L
1973 III 1-Ton 26600082B ex-SEB MRX287L
http://eblrs.org/
1966 IIA Swb 24125067C ex-SEB managers vehicle HMO968D
1969 IIA 1-Ton 22900013A ex-SEB NBK148G
1972 III 1-Ton 26600078A ex-SEB Cherrypicker VJT440L
1973 III 1-Ton 26600082B ex-SEB MRX287L
-
DasLandRoverMan
- The 1-Ton Welder
- Posts: 1334
- Joined: Sat Oct 20, 2012 9:33 am
- Location: West Lakes
- Contact:
Re: Paint your Wagon
Nah, the only complaint about the mudflap is that it's singular, not plural.
-
Wheeledbeast
- In overdrive
- Posts: 1360
- Joined: Mon Apr 15, 2013 1:41 pm
Re: Paint your Wagon
in that case keep your eyes peeled in the hedgerows for a left hander-
Wheeledbeast
- In overdrive
- Posts: 1360
- Joined: Mon Apr 15, 2013 1:41 pm
Re: Paint your Wagon
Slow progress at the moment, hope to get more done over the bank holiday. I did manage to get the compression tester on to the engine. plugs 1 and 2 looked a bit oily and the compression was 10.5 bar. plugs 3,4,5,6 all had good looking plugs and gave compression readings of 11 bar. Both of those readings are in the "Green zone" on my tester, so i guess there is nothing major wrong inside the engine  has any body and ideas or opinions on weather these readings are okay for a six

The other minor mod has been to shorten the Dipstick to allow me to get it out with out with less of a fiddle (and less burnt fingers )
)
has any body and ideas or opinions on weather these readings are okay for a six The other minor mod has been to shorten the Dipstick to allow me to get it out with out with less of a fiddle (and less burnt fingers
)
Last edited by Wheeledbeast on Fri Aug 04, 2017 6:47 am, edited 1 time in total.
-
Wheeledbeast
- In overdrive
- Posts: 1360
- Joined: Mon Apr 15, 2013 1:41 pm
Re: Paint your Wagon
I managed to get the new shock on the near side. As it is only two bolts I thought it would be an easy job  . Unfortunately the axle end bushes are so fat that you cannot get the nut onto its thread. So you need to squash the bushes, to squash the bushes you simply tighten the nut on the thread. Except that the bushes are too fat and you cannot get the nut onto the thread. So you need to squash the bushes, to squash the bushes…Arrggggg
Eventualy after much swearing I managed to lever the shocker against the axel and get half a turn on the thread, but what a palaver

That is when I noticed the play in the wheel bearing . So I opened the hub to have a look. It all seemed well greased, and in good order, so I have just turned the nut a ¼ turn and locked it up again. What I did notice was that the ENV half shafts are considerably larger than there rover equivalents. (This bit might be heresy, but I thought they were a superior design too, non of that messing about with fiber washers and split pins). 
. Unfortunately the axle end bushes are so fat that you cannot get the nut onto its thread. So you need to squash the bushes, to squash the bushes you simply tighten the nut on the thread. Except that the bushes are too fat and you cannot get the nut onto the thread. So you need to squash the bushes, to squash the bushes…Arrggggg Eventualy after much swearing I managed to lever the shocker against the axel and get half a turn on the thread, but what a palaver
That is when I noticed the play in the wheel bearing
. So I opened the hub to have a look. It all seemed well greased, and in good order, so I have just turned the nut a ¼ turn and locked it up again. What I did notice was that the ENV half shafts are considerably larger than there rover equivalents. (This bit might be heresy, but I thought they were a superior design too, non of that messing about with fiber washers and split pins).
Last edited by Wheeledbeast on Fri Aug 04, 2017 6:45 am, edited 1 time in total.
-
thelandymob
- High range
- Posts: 49
- Joined: Sun Nov 11, 2012 9:29 am
Re: Paint your Wagon
but what a palaver
i bet you haven't tried removing a halfshaft yet ? now that is a real palaver ! as you can't just pull them out like the skinny rover one'sWhat I did notice was that the ENV half shafts are considerably larger than there rover equivalents
cheers
jim
Who is online
Users browsing this forum: No registered users and 48 guests